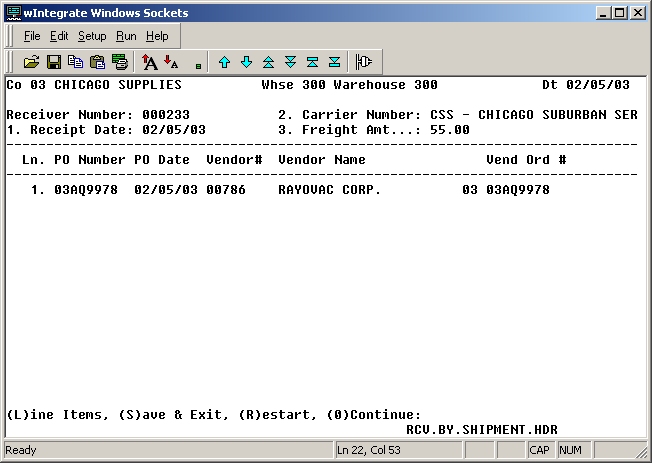
The PO Line Item screen is a two-part screen. The top part is the header area, where you enter information about the receiver. For the bottom part of the screen, use the bill of lading (shipping receipt) that arrived with the PO shipment to enter each PO as a line item for the entire shipment. The first PO entered determines to which vendor the receiver applies. All POs must be for this same vendor, as well as for the company and warehouse selected on the Receive by Shipment Log-on screen.
Following is a list of the fields in the header area of the PO Line Item screen:
Receiver Number (If this is an existing receiver, enter the receiver number at this prompt. If this is a new receiver, enter NEW at this prompt or enter your own new number. If you enter your own number, you can use a number that corresponds to the specific shipment you are receiving.
Receipt Date: Enter the day that the shipment was received.
Carrier Number: Enter the carrier number for this shipment. To select from a list of valid carriers, enter ?? at this prompt.
Freight Amt: Enter the dollar amount of the freight charges for the entire shipment.
Note: Once all of the products on the receiver have been received, you can have the system allocate the freight amount to individual items on the receiver. When you allocate freight to a receiver, the system determines the average freight amount per product, and that average is allocated to each of the products on the receiver that arrived in your warehouse. For more information, refer to Allocate freight for a receiver.
The following fields are available for each line item in the bottom area of the screen:
PO Number: Enter the PO number.
PO Date: This is the date of the PO.
Vendor#: This is the vendor number.
Vendor Name: This is the vendor's name.
Vend Ord#: If the vendor has assigned an order number to the PO, enter it in this field.
Following is a sample screen shot:
